


|
|
In general, the CSY44 is a very well constructed boat. All fiberglass is well finished, even in inaccessible spaces. There were some areas in our boat that needed some attention to restore Imagine for offshore voyaging. SteeringThe port side steering sheave support under the aft berth was flexing substantially. The bulkhead that supports it had been cut away by the factory to clear the aft corner of a drawer. I glassed 1/4" front and back and added a 1/4" x 2" x 2" aluminum angle that'll take the compression load and transfer it to the hull and berth support framework.
ForedeckDeck flex under the windlass and cutter stay was disconcerting. Since we're relying on our cutter stay to carry our storm headsail, I wanted it overbuilt. We're upsizing the wire from 1/4" to 5/16". A a fir 2x12 was shaped to fit the curve of the underside of the deck and I glass wrapped it and bonded it in place with thickened epoxy. I also fabricated a tension rod that'll transfer the strain of the cutter stay to a 1/2" U-bolt in the bow.
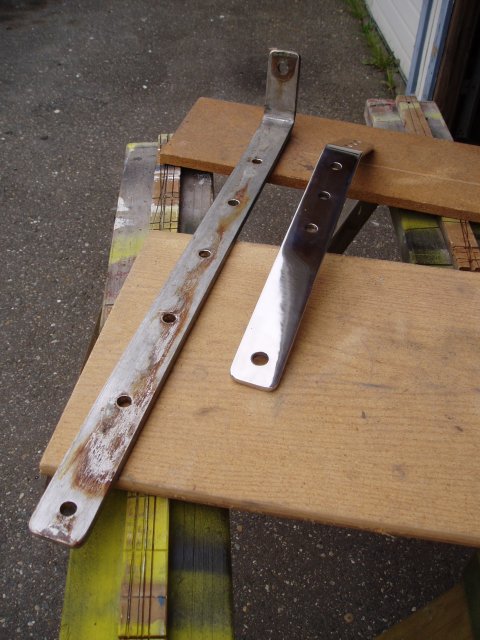
ChainplatesThe bow and stern chainplates showed signs of crevice corrosion, so I ordered 57" of 2" x 3/8" 316L stainless to fabricate new ones.
The starboard forward chainplate showed signs of corrosion and cracking, too. So I borrowed some ideas from Memory Rose (thanks Ron) and designed new external plates. I'd made up a drawing (Files/chainplates drawing.pdf Files/CHNPLTS.DXF ) and sent it out for quotes for both laser cutting and waterjet cutting. The more I talked to folks, waterjet sounded like the way to go - no heating of the part, no contamination (carbon = rust) and low cost. Al at Excell Aerofab in Arlington, WA. was very helpful and their cost ($35/part) was pretty easy to swallow. I purchased the stainless from Alaska Copper and Brass - they're a metal supplier in Seattle - and had it drop shipped to Excell Aerofab. I don't know if there is a competitive waterjet cutting thing going on here in the northwest due to lots of shops that support Boeing, or if waterjet cutting is just that economical. I know there are waterjet cutters all across the country, and it's a MUCH easier/faster process than machining, plus the square holes for carriage bolts are easy. They will have to ream the 5/8 holes for the clevis pins, but can waterjet cut them slightly undersize first so it's not too tough. Removing the backstay plate is the easiest if you don't mind someone sitting on top of you working the outside bolts while you're in the aft deck locker holding the nuts. (I'm doing this with the boat in the water, and the mast standing) Pictures of the installation forthcoming... Update 9-23-04 All the chainplates are done now (finally getting time to put up the pictures). I ended up using a nut breaker (from Sears) which helped immensely in removing the old chainplates. Polishing them was a BIG job. Dad and I spent 10 hours using progressivly finer grits to get a mirror finish. Dad also found time to flame-cut some 3/4" plate into a prop puller - just need some threaded rod and nuts. The starboard side toerail needed rebedding, so I cut the slots for the chainplates while it was off. I did the port side with the toerail in place and used a drill, jigsaw and file to cut the slots. The old chainplate holes were filled with glass-filled epoxy and a woodblock plug epoxied into the toerail cap to fill the old chainplate exit holes.
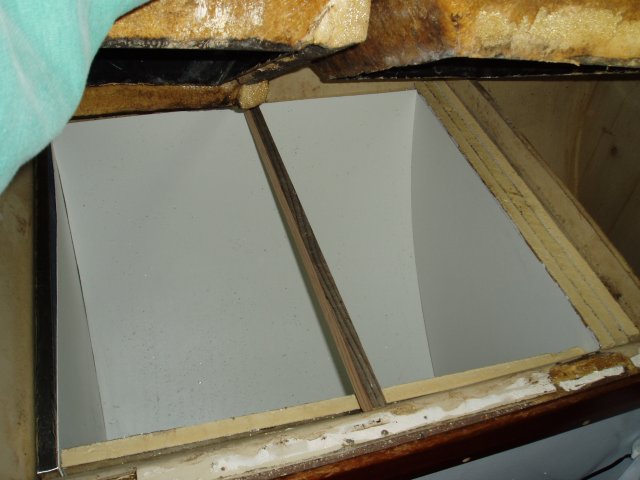
RefrigerationThis has been a tough one - we've gone back and forth whether we want/need it or not. I've completely removed the old engine driven system, so had a clean slate to start from. No refrigeration would mean not as many solar panels ($) and no additional structures to mount them to ($$), plus saving the money on the refrigeration sytem itself ($$$). 'Course no cold drinks, no fruit slushies or fresh-squeezed fruit juice popsicles for the kids... no ability to keep fresh meat for more than a day (or two)... having to drink a whole box of long-life milk in a day instead of stretching it for 3-4... Tough call. I decided on a 12V system, watercooled condenser, Danfoss BD50 compressor, and icebox evaporator. I'm building it from scratch so could size things to fit where I wanted them. I wanted high efficiency and "scaleablility" depending on how much power we feel can spare vs. how much stuff we'd like to keep cold. I cut down the volume of the stock refer/freezer significantly, and added more insulation to the inside. 4" of insulation block off the aft 1/3 from the forward 2/3. 1" of insulation on the forward and inboard surfaces, 2" on the outboard (along the hull), and a 1" insulated divider between the forward and middle sections. This required pulling the top off the refer (which is lots-o-fun!), but a good opportunity to support it better so it's flat and the lids will fit tightly. The evaporator will go in the forward section, and should have enough capacity to freeze the whole (~3cuft) compartment if desired, in which case the center section will be at refrigerator temps due to the cold leaking thru the 1" divider (assisted by a fan if necessary). When we don't need lots of frozen stuff, we can use just the evaporator as a freezer compartment (14" x 8" x 11") and the remainder of the forward section as a refrigerator. The center section will be cool storage. The aft section will be used for long term dry goods storage.
The condenser is a coil in a tank of water (about 1 gallon) with a small PAR controlled b a head pressure switch in the discharge line from the compressor. That way the water pump only runs when it needs to, saving wear and power. In the northwest (water temp ~58-60F) the pump only cycles on a couple times a day for about 15 seconds. We're having trouble with the whole compartment getting too cold. The compressor is controlled by a thermostat mounted to the side of the evaporator, and is set to below freezing to keep the condensation from dripping off the plates. I need to add insulation around the evaporator so the cold stays in it better and we stop making iceblocks out of our milk. Other than that it's working great. We can easily freeze the whole compartment, or just use the evaporator for a small (~1 cuft) freezer and the rest as a pretty cold fridge. The middle compartment gets enough cold leaking through the R7 insulation divider to make a decent fridge for things that don't have to stay really cold.
Leak PatrolA persistant leak behind te stove in the galley defied an easy solution. I determined that water was making it's way through some small cracks in the hull to deck joint around the steps. I chipped away a bit at some loose filler that appeared to be filled with resin and no glass (same problem as I'd found in the cockpit coaming over the fridge that was leaking badly). Before I knew it, I'd opened up a 2" gap that tapered aft about 7ft under the toerail... Below is a picture taken during the "chipping" phase.
I filled it with glass fiber filled epoxy and finally, unfortunately, developed a sensitivity to epoxy... bummer... no more epoxying for me! Good news is that the leak is no more. On the starboard side I just dribbled some epoxy in the cracks and wouldn't let myself start chipping.
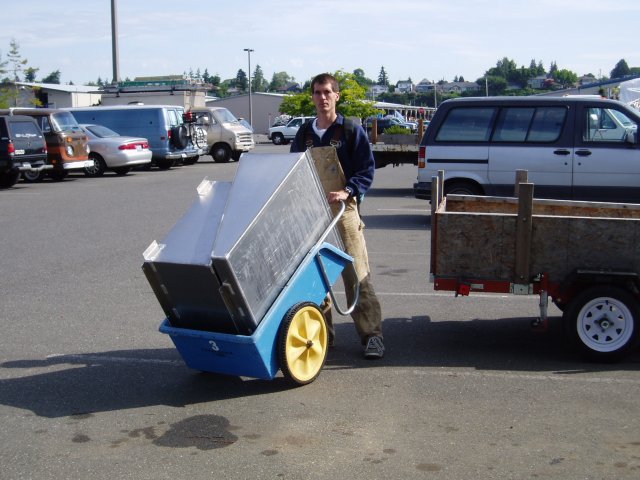
Other Projects:Let see... new rigging, new chainplates, new engine, new fuel tanks, new electrical panel, bus, wiring and batteries. stern arch, windvane, solar panels, mainsail, mast steps, Profurl headsail furling, a level floor in the engine room... too much to write about, but here are a few more pictures from the pile:
|